
 English
 Español
Content
- 1 What the Timer on a Battery Operated Candle Actually Does
- 2 Step-by-Step Guide: Reset the Timer with the ON/OFF/TIMER Switch
- 3 How to Reset the Timer with a Remote Control
- 4 Timer Reset Methods by Candle Type
- 5 Why Your Timer Won't Reset and How to Fix It
- 6 Battery Life Facts: What the Timer Actually Saves
- 7 When You Should Reset the Timer and When You Shouldn't
- 8 How to Verify That the Reset Worked Correctly
- 9 Buying Advice: What to Check Before You Order
- 10 Frequently Asked Questions
- 10.1 How do I reset the timer on battery operated candles?
- 10.2 Does removing the batteries reset the timer?
- 10.3 Why is my candle staying lit in TIMER mode?
- 10.4 Can I change the timer from 6 hours to 8 hours?
- 10.5 How long do batteries last with the timer on?
- 10.6 Why do my two flameless candles turn off at different times?
- 10.7 Should I leave my flameless candle in ON or TIMER mode?
To reset the timer on battery operated candles, slide the switch on the bottom from OFF to TIMER and wait five to ten seconds in between. This single action clears the old timing cycle and starts a fresh 24‑hour rhythm of 6 hours on and 18 hours off. On remote‑controlled models, the same reset is done by holding the TIMER button for three to five seconds until the flame blinks twice.
Most people only think about the timer when things go wrong: the candle stays lit all day, turns on at the wrong hour, or two identical candles refuse to switch off at the same time. In most cases, none of these problems means a faulty candle. The timer chip simply needs to be restarted, and the restart procedure is nearly identical across tealights, pillar candles, taper candles, and glass flameless candles.
This guide explains what the timer does, how to reset it with a switch or a remote, how to troubleshoot stubborn candles, and how much battery life the timer actually saves. The procedures below are based on the designs used in our own factory at Ninghai Shuangmei Electronic Co., Ltd., and they also match the general behavior of most exported battery operated candles on the market today.
What the Timer on a Battery Operated Candle Actually Does
A timer in a flameless candle is not a mechanical countdown device. It is a tiny integrated circuit that controls the current flowing to the LED. When the switch is set to TIMER, the candle lights up immediately, and the chip begins counting from that exact moment. After the "on" window finishes, the chip cuts the current for the rest of the 24‑hour cycle, then reconnects it at the same wall‑clock time the next day.
The most common cycle in exported battery operated candles is 6 hours on / 18 hours off. If you move the switch to TIMER at 7:00 PM, the candle stays lit until 1:00 AM, switches off, and then relights at 7:00 PM the following evening. This is why the timer is often described as a "fixed 24‑hour repeating schedule."
| Cycle | On time | Off time | Typical use |
|---|---|---|---|
| 4 h / 20 h | 4 hours | 20 hours | Short evening use in some European-market candles |
| 5 h / 19 h | 5 hours | 19 hours | Compact candles, early-night only |
| 6 h / 18 h | 6 hours | 18 hours | Industry standard on most export flameless candles |
| 8 h / 16 h | 8 hours | 16 hours | Longer evening windows, tavern-style large pillars |
The 6‑hour setting dominates because it matches the average time a household wants decorative lighting in the evening, while still leaving 18 hours of battery rest. The chip itself consumes almost no current while waiting, so the timer does not noticeably drain the battery when the LED is off.
Step-by-Step Guide: Reset the Timer with the ON/OFF/TIMER Switch
The majority of battery operated candles use a three-position slider on the bottom or lower back. Resetting the timer on this type of candle takes less than thirty seconds:
- Remove the candle from its holder and turn it upside down so the base is visible.
- Locate the slider switch. It is clearly marked ON, OFF, and TIMER in nearly all cases.
- Slide the switch to OFF and wait for ten seconds. This fully discharges the timer chip and clears the previous counting state.
- Slide the switch to ON briefly to confirm the LED still responds.
- Slide the switch to TIMER. The candle lights again, and the new 6‑hour on / 18‑hour off cycle starts at this moment.
- Return the candle to its position and note the current time. The candle should turn off automatically after the on window and relight at the same time the next day.
| Position | Behaviour | Best used for |
|---|---|---|
| OFF | Complete cut-off of current | Storage, shipping, battery replacement |
| ON | Continuous light, no timer | Dinner parties, full-day displays, event use |
| TIMER | 6 h on / 18 h off repeating cycle | Daily ambient lighting, home decor |
The "ten-second rule" exists because the timer chip needs a moment to lose its previous counting state. A quick flick from ON to TIMER often does not clear the memory; the candle may then continue from the old schedule instead of starting a fresh one.
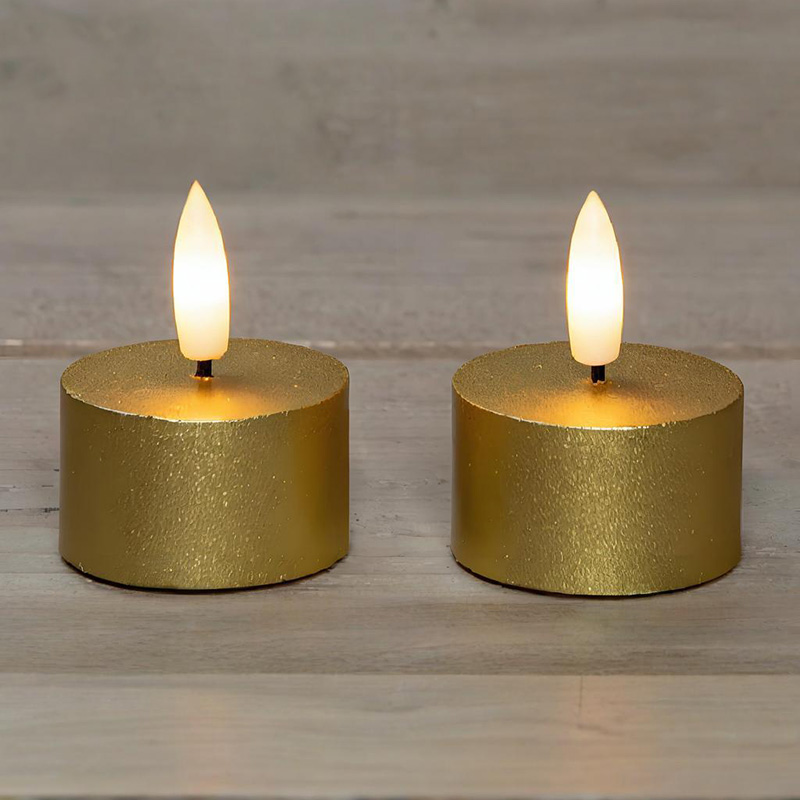 Set of 2 Golden Flameless Tealight Candles with TimerThese compact tealights use the same three-position slider as larger models, making them ideal for testing the ten-second reset rule. Their golden finish adds a warm accent to any space.View Product →
A useful habit is to slide the switch to TIMER at the exact time of day you want the candle to light up. If you want your living-room candles to turn on at 6:00 PM every evening, complete the reset procedure at 6:00 PM sharp. The same rule applies to small tealight-format candles, which use an identical three-position slider inside a more compact housing.
How to Reset the Timer with a Remote Control
Remote-controlled flameless candles work in a slightly different way. The timer is often held in the remote's memory, not in the candle itself, and the two devices communicate through a short radio-frequency or infrared link. This means replacing the candle's battery alone will not reset the cycle. You have to re-synchronize the candle and the remote.
Here is the standard reset and sync procedure used by most battery operated candles that ship with a remote:
- Insert fresh batteries into both the candle and the remote control, and make sure the candle's physical switch is set to ON.
- Within five seconds of powering the candle, press and hold the TIMER button for three to five seconds.
- Watch the flame. Most candles respond with two quick blinks or a rapid flicker to confirm that the timer command was received.
- Press the TIMER button once more. The candle should now run a fresh 6‑hour on / 18‑hour off cycle anchored to the current time.
If you have several remote candles in the same room, reset all of them within the same minute. Otherwise their internal clocks can drift a few minutes apart, and the candles will turn on and off at slightly different times. The re-sync procedure above, done for each candle one after another, brings the whole set back into step.
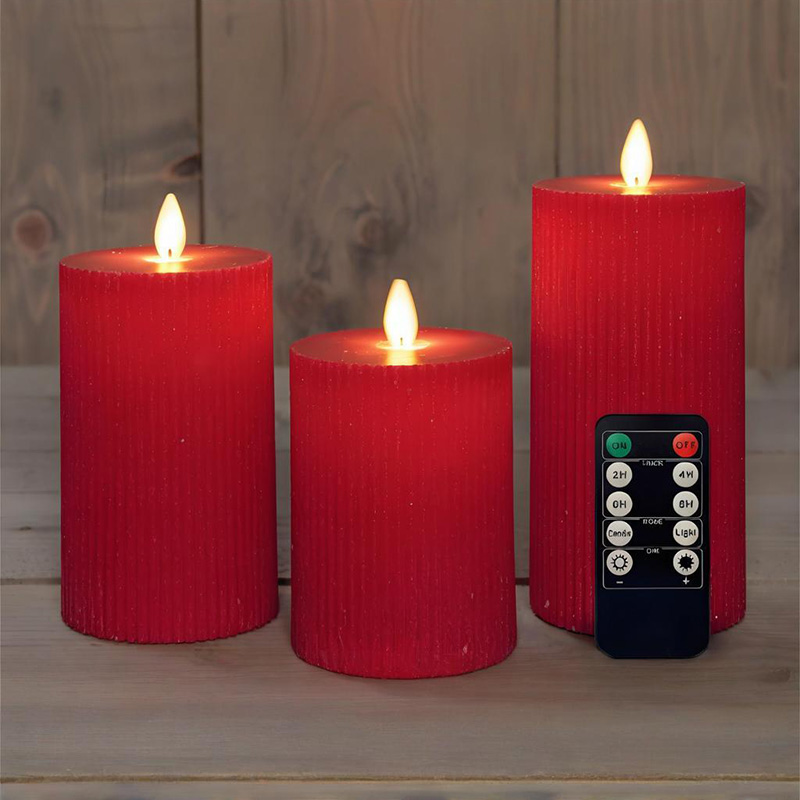 Set of 3 Red Flameless Pillar Candles with RemoteWith a ribbed surface, moving flame, and remote control, these pillar candles suit holiday displays. The timer reset guidance here helps keep multiple units synchronized.View Product →
Infrared remotes require a clear line of sight to the candle, while radio-frequency remotes work through glass shades and candle holders. If the remote seems unresponsive, check the remote's own battery first, then move closer and repeat the hold-the-button step.
Timer Reset Methods by Candle Type
The reset procedure stays basically the same across all common candle formats, but the position of the switch and the presence of a remote can change the details. The table below summarizes what to expect from each type:
| Candle type | Switch location | How to reset the timer |
|---|---|---|
| Tealight candles | Bottom, tiny slider | OFF for 10 seconds, then TIMER |
| Pillar candles | Base, slider or button | OFF for 10 seconds, then TIMER; or hold remote TIMER for 3 to 5 seconds |
| Taper candles | Bottom cap, slider | OFF for 10 seconds, then TIMER |
| Glass candles | Under the base, slider or button | OFF for 10 seconds, then TIMER; remote models need re-sync |
| Rechargeable candles | Touch or power button | Hold the button for 5 seconds to restart the cycle |
A few inexpensive candle models only have a two-position switch with ON and OFF and no timer at all. If you do not see a TIMER position on the base, the product simply does not include an automatic cycle, and no reset procedure will change that.
 3 Pack Gray Flameless Glass Candles with RemoteThese glass candles feature a recessed base switch and remote-controlled operation. Their elegant gray glass and realistic flicker make them a charming, safe decoration for any room.View Product →
Glass-bodied candles deserve extra attention because the switch is usually recessed under the base. You may need to tilt the candle slightly to reach it. Remote-controlled glass candle sets rely on the same hold-the-TIMER-button procedure described earlier rather than a physical slider reset.
Why Your Timer Won't Reset and How to Fix It
Sometimes the reset procedure does not produce the expected result. The list below covers the most frequent problems we see in factory testing and customer returns, along with the practical fix for each one.
- The candle stays permanently on in TIMER mode. Remove the battery completely, wait thirty seconds, then insert it again. This hard reset clears the chip. If the candle still behaves the same way, the timer module is defective and the unit should be replaced.
- Two candles in a pair turn off at different times. Each candle has its own chip, and they start counting from the moment their individual switches enter TIMER. Reset both candles at the same clock time, within the same minute, to bring them into sync.
- The remote button does nothing. Check the remote's battery first. For infrared remotes, remove any glass shade between the remote and the candle. For radio-frequency remotes, stay within the operating range stated by the manufacturer, usually 8 to 10 meters.
- The timer resets itself after battery replacement. This is normal. Replacing the battery clears the counting state on candle-side timers. You need to re-enter TIMER mode at the desired time after every battery change.
- The candle flickers but never shuts off. This indicates a stuck timer circuit. Perform the battery removal hard reset described above, and verify that the switch is not sitting halfway between the ON and TIMER positions.
If your candles are used near curtains, bedding, or other fabrics, a reliable timer reduces the time they run unattended and keeps the LED from staying active for hours after everyone has left the room. You can read more about safe usage practices in our article on precautions for using electronic candles.
Battery Life Facts: What the Timer Actually Saves
The most commonly quoted benefit of the timer is battery saving, and the math is straightforward. A candle left in continuous ON mode draws current around the clock. The same candle in TIMER mode only draws current for six hours per day, so the calendar life of the battery stretches by roughly four times, assuming a 6 h on / 18 h off cycle.
The figures below come from our own internal tests at Ninghai Shuangmei Electronic Co., Ltd., measured with standard alkaline batteries at room temperature on a high-quality flickering LED module.
| Candle type | Batteries | Continuous ON | Timer mode (6 h / 18 h) |
|---|---|---|---|
| Tealight | 2x CR2032 | 180 to 220 hours (about 8 to 9 days) | 4 to 5 weeks |
| Pillar candle | 3x AA | 300 to 400 hours (about 12 to 16 days) | 7 to 9 weeks |
| Taper candle | 2x AA | 250 to 300 hours (about 10 to 12 days) | 6 to 8 weeks |
Two additional points are worth remembering. First, the 18 hours of off time per day also means the LED module is under less thermal stress, which can extend the light output consistency of the LED. Second, the reset action itself draws virtually no power; sliding the switch between positions does not shorten battery life in any measurable way.
When You Should Reset the Timer and When You Shouldn't
Regularly resetting a working timer is unnecessary, but there are several clear situations where a reset genuinely improves the candle's behaviour:
- Right after installing new batteries, because the previous counting state is lost anyway.
- After moving a candle to a different room with a different evening pattern.
- When the candle was accidentally left in continuous ON mode for several days and you want to return it to an automatic schedule.
- When a group of candles has drifted out of sync and needs a common starting point.
At the same time, avoid unnecessary resets:
- Do not reset if the candle is already switching on and off at the desired times.
- Do not leave the switch in OFF for long periods as a "standby" habit; just use the TIMER position.
- Avoid cycling the switch rapidly. Quick flicking can leave the chip in an undefined state that looks like a timer failure.
A useful rule of thumb: think of the reset as setting an alarm clock, not as a maintenance task. Set the timer once, at the moment you want the candle to light up, and then leave it alone.
How to Verify That the Reset Worked Correctly
A quick verification process takes about ten seconds now and one check later. Follow these steps to confirm the timer is running properly:
- Slide the switch to TIMER at a known time, for example 8:00 AM.
- Check the candle at the end of the on window, in this case 2:00 PM. It should be off.
- Check again one minute after the cycle restarts, here 8:01 PM. It should be on again.
If the candle passes all three checks, the timer is reset and the 24‑hour repeating cycle is working correctly. For remote-controlled candles, the same verification applies, but you should also test the remote's TIMER button once to confirm the radio link is still active.
Buying Advice: What to Check Before You Order
If you are purchasing flameless candles for a shop, a hospitality project, or your own home, the timer design matters more than the outer look. Based on years of supplying battery operated candles, we recommend checking five points before placing an order:
- Switch accessibility. A recessed switch on the bottom is safe but can be awkward. For frequent timer resets, choose a slider that sits flush but is still reachable with a fingertip.
- Timer cycle documentation. Ask the supplier for the exact on/off cycle. A product that says "timer included" may use 4 h / 20 h instead of the standard 6 h / 18 h.
- Remote frequency and range. Radio-frequency remotes are more reliable than infrared when candles sit inside glass holders.
- Battery replacement method. Check whether the candle uses coin cells or AA batteries, since replacement frequency affects long-term running costs.
- Sync behaviour. Ask whether pairs and sets share a common timer signal, because individual candles from the same batch can drift apart by a few minutes.
A well-designed timer adds almost nothing to the manufacturing cost, but it has a big effect on user satisfaction. If you are evaluating suppliers, ask for the timer cycle and switch layout in writing, and test a sample before committing to a large batch. You can explore the full range of configurations we build in our factory on the official product catalogue.
Frequently Asked Questions
How do I reset the timer on battery operated candles?
Slide the switch on the bottom or back to OFF, wait ten seconds, then slide it to TIMER. The candle lights again and starts a fresh cycle of 6 hours on and 18 hours off. For remote models, hold the TIMER button for three to five seconds until the flame blinks twice.
Does removing the batteries reset the timer?
Yes, for most candles the timer chip loses its counting state when the batteries are removed. You will need to set the switch back to TIMER at the desired time after reinstalling fresh batteries. On remote-controlled models, a battery change in the candle alone may not reset the timer if the schedule is stored in the remote, so re-sync the pair.
Why is my candle staying lit in TIMER mode?
A candle that never switches off in TIMER mode usually has a stuck chip or a switch that is not fully clicking into the TIMER position. Take the battery out for thirty seconds, then put it back and try again. If the candle still stays on, the timer module is likely defective.
Can I change the timer from 6 hours to 8 hours?
No, the timer cycle is fixed at the factory and cannot be adjusted by the user on most battery operated candles. The switch only selects between continuous ON, OFF, and the pre-programmed TIMER cycle. If you need an 8-hour cycle, look for a model that states the longer cycle in its specifications before ordering.
How long do batteries last with the timer on?
In our factory tests, a tealight using 2x CR2032 cells lasts 4 to 5 weeks on a 6 h / 18 h cycle, compared to only 8 to 9 days in continuous mode. A pillar candle with 3x AA batteries lasts 7 to 9 weeks on the timer. Exact life depends on the battery brand and the LED brightness.
Why do my two flameless candles turn off at different times?
Each candle has its own independent timer chip that starts counting from the moment its switch enters TIMER mode. If you set one candle at 6:00 PM and the other at 6:05 PM, they will always be five minutes apart. Reset the whole group together, within the same minute, to get synchronized behaviour.
Should I leave my flameless candle in ON or TIMER mode?
Use TIMER mode for normal daily decoration. It gives you the same evening ambiance while saving roughly 75 percent of the battery consumption compared to continuous ON. Reserve the ON position for special events where you need the candle to stay lit for many uninterrupted hours.